How to Connect a Turntable to a Computer
In today’s digital age, connecting devices to a computer is commonplace. From phones to security systems, everything seems to rely on being connected to our computers. For those who enjoy records, a turntable may be your current playing device. (For those who are not familiar with records, a turntable is a circular revolving platform or plate that supports a record as it is played. These items existed before the cassette tape, compact disc (CD) and iPod.) However, did you know that you are not just limited to an outdated record player?
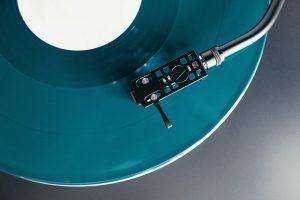
Certain newer turntable models, like the Audio-Technica AT-LP120BK or Sony PSLX300USB, have universal serial bus (USB) connectors that make it easy to connect to a computer. Other turntable models, however, do not. This includes older models and many of the higher-end turntables available today.
Connecting Your USB Turntable to Your Computer
USB turntables are designed to work easily with a computer. Many come with all of the software you will need to install on your computer for easy plug-and-play access. Typically, you simply need to install the software first, and then plug your turntable into the computer. That is it. Depending on the software, recording and playing your vinyl records is relatively easy.
USB turntables typically produce average audio files when digitalizing their output. For the price, hobbyists find these to be acceptable. Are they going to make the next best number one album? Probably not. However, for a beginner or person who likes to just play around with turntables, they are good enough for the value.
Connecting Your Non-USB Turntable to Your Computer
Higher end turntables tend to be non-USB models, as are versions that were produced prior to the CD. Turntables tend to come in stereo-stack or stand-alone models. If your turntable is part of a stereo stack, it likely already includes a preamplifier. The preamplifier is important. (Most people may confuse the amplifier with the preamplifier. While you use an amplifier when you play your music live, you will not need the actual amplifier when connecting to a computer. We will talk about this a bit more later.) A preamplifier helps to ensure any recordings maintain a decent volume.
The below steps will help you connect a stand-alone turntable to your computer. Keep in mind, all turntable models have their own features and nuances. While we provide the basic steps for connecting your turntable to a computer, some variations may occur.
Step 1: Gather the Necessary Items
Obviously, you will need a computer and turntable if you are intending to connect them. In addition to your these items, you will need two RCA cables. Also referred to as a phono connector, an RCA cable typically comes as a single or multiple connectors. You may be familiar with these cables since televisions often use them to connect to VCRs or other devices. You want your RCA cable to be two-pronged when you connect your turntable to your computer, laptop or MAC. If your computer does not have RCA cable inputs, you may need a stereo to 3.5mm converter as well. (They also now make a 3.5mm USB converter too.)
In addition to the RCA cables, you also need the preamplifier mentioned above to maintain volume quality. (Again, this is different from an actually amplifier. However, some amplifiers contain a built-in preamplifier, which you do need. Sound confusing? We will clarify this later on.)
Unlike the USB turntable which comes with the necessary software, a downloadable software will also be required. Both MACs and PCs have several software packages that can be used. Audacity, for example, is a free software that can work on both MACs and PCs should you choose to install it.
Finally, you will want to clear a workspace that will allow you to keep your items flat and free from vibrations. Vibrations can cause your turntable to subtly alter any output. When amplified, these vibrations may cause the recorded sound to vary from what you heard. It is important to note that digitalizing your recordings is a real-time conversion. This means that if you are trying to digitalize 40 minutes’ worth of music, it will take you 40 minutes to convert it.
An optional addition would be the purchase of a large external hard drive for your computer. Audio files can be rather larger. Depending on the size of your internal computer hard drive, you might find it hard to maintain multiple albums. (On average, a single digital track can take up around 30 mega bites (MB). That means a 10-song album will average 300MB. If you are recording you entire record collection, this can add up quickly.)
Step 2: Verify Your Turntable Settings and Prepare
You will want to make sure your turntable’s tone arm is weighted. Verify that the anti-skate and tracking force for your turntable are correctly set to ensure the sound quality is optimal. Verify your records are clean, after all, dirt and dings can cause your recordings to skip or sound unclean.
It is a good idea to pre-set up your intended folders on your computer. This can save you time and keep your files organized early on.
Step 3: Connect the Turntable to the Preamplifier & Amplifier
Using one of your RCA cables, connect one end to your turntable’s output ports. (In general, red and white, or red and black will correspond to your similarly colored right and left audio channels. Disregard the yellow as it is intended for video use.) You can then connect the other end to your Phono In port on your external preamplifier or amplifier.
Step 4: Connect the Preamplifier or Amplifier to the Computer
Using your second RCA cable, you can now connect your preamplifier or amplifier to your computer. This time, plug your RCA cable into the output ports on your preamplifier or amplifier. The other end of the RCA cable will then connect to your computer. If you are using one of the 3.5mm converters, simply plug the RCA cable into the corresponding converter ports. Then plug this into the Line In port on your computer or the USB area.
A Note on Preamplifiers
As stated above, if your turntable or amplifier do not include an in-built preamplifier, you will need to purchase one. This external preamplifier will cost you between $150 and $25,000. This depends largely on the brand, quality, and included features.
Preamplifiers can be include with the amplifier or the turntable itself. If your amplifier has an in-built preamplifier, it will have a Phono port. This feature is standard on older units that were produced prior to CDs. For modern amps, the inclusion of this feature varies between models. (Although most high-end amplifiers will include a Phono port.) To see if your turntable has an in-built preamplifier, you should check your manual. Older models, for example, likely will not include this. Low-cost turntables often use cheap knockoffs if they include a preamplifier at all. Determining whether your turntable’s in-built preamplifier is up to industry standards can be hard, which is why an external is generally recommended.
If you have determined that both your turntable and amplifier have an in-built preamplifier, it is important that you only use one. If your turntable has an in-built preamplifier, do not connect it to the Phono input on your amplifier. You should plug it into a different port on your amplifier, or turn off the turntable’s preamplifier instead.
You do not actually need to use an amplifier when connecting your turntable to your computer as most software options will include one. However, you will need to use an amplifier if it contains your intended preamplifier.
Using Your Turntable to Create Digital Recordings
You should have installed your computer software before connecting your turntable. However, you will likely need to tell your software to identify or detect your turntable. (With Audacity, you use the “Rescan Audio Devices” drop down to detect your turntable once it is connected to your computer.) You should test your software settings before you put serious effort into recording a track. After all, no one wants to put hours into an effort only to find out that the connection failed and you did not record anything at all.
It is important to remember the real-time recording factor. When you are recording a record, it creates a single file that you will later need to dissect. This means you will record side A and side B during one setting. (You will not stop your recording while you flip your record over.)
When you digitally record an audio file, your computer presents it as a waveform. The thicker the bar, the louder the volume is. Similarly, thinner lines visually represent quieter volumes. Spikes and flat lines also indicate differences. Spikes, for instance, indicate things like cymbals and other high-peak sounds. Flat lines, therefore, indicate silences. Knowing these patterns can help you identify where one song ends and another begins.
Most recording software will include features like volume adjustments and sound quality clean up. Even if your software includes a self-adjusting amplifier, this may not be enough. Audacity, for example, will automatically attempt to amplify your recording. However, it also allows you to manually adjust this setting. It also allows you to apply a Recording Industry Association of America (RIAA) auto-equalizer or manually adjust it yourself.